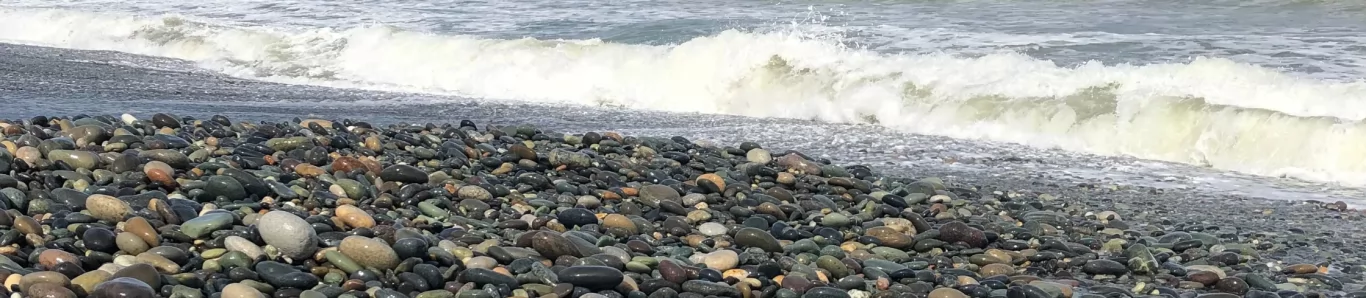
Batch 29 holds special significance for me as it involves tumbling and polishing some highly precious stones that I have been given. These stones were received by my good friend as a birthday gift, and I feel honored to be entrusted with the task of tumbling and polishing them. The remaining stones in this batch come from my personal collection of Gemstone Beach stones that have been patiently awaiting their turn to be tumbled and polished.
Batch 29: 3lb Tumbler 4
Stage 1: 80/100grit
Number of Stones: 35 + 7
Weight in: 931g
4 Tbspns of 80/100grit – no pellets
Days Tumbling: 10
Weight out: 811g – loss of 120g
Stage 2: 220grit
Number of Stones: 38
(4 stones removed)
Weight in: 762g
4 Tbspns of 220grit – pellets added
Days Tumbling: 11
Weight out: 679g – loss of 83g
Stage 3: 400grit
Number of Stones: 38-2+7
Weight in: 752g
4 Tbspns of 400grit – pellets added
Days Tumbling: 11
Soap Tumble: 24 hours
Weight out: 655g – loss of 97g
I have removed four stones from Stage 2 (220grit) and placed them in the holding box. Additionally, I have placed two stones that were removed at Stage 3 in the holding box as well. The seven stones that were added at Stage 3 (400grit) originally came from Batch 28 and required redoing. After a 24-hour soap tumble I transferred 43 stones to the 4lb Tumbler for polishing and burnishing. This time for polishing I am using tin oxide instead of the usual tumble polish mix because tin oxide is a high polish finishing compound. I am eager to see if there is a noticeable difference between the two methods.
Batch 29: Pre-tumble


Batch 29: Added at Stage 3


Batch 29: Removed


The two photos of the same stone highlighted to me just how different a stone can look in different lights and backgrounds! The one on the left looks more like what the stone looks like to the naked eye (well mine anyway) yet the photo on the right show way more detail and colour not so obvious to the naked eye. (Reminds me of the aurora which looks so different in camera as opposed to the naked eye!)
Transfer to 4lb Tumbler
Batch 29 (43 stones) along with Batch 27 & 28(85 stones) have been transferred to the 4lb tumbler for polishing. As mentioned previously I’m using Tin Oxide for the polish instead of the usual Tumble Polish Mix. Tin Oxide is VERY expensive so I really am hoping that it turns out a better finish!
Stage 4: Tin Oxide
Number of Stones: 85 + 43
Tin Oxide: 8 Tbspns of tin oxide mixed with 600mls of clean water. Pellets added.
Days Tumbling: 11
Stage 5: Burnish
2 Tbspns of Borax to clean and clear any remaining polishing mix. Pellets added.
Days Tumbling: 2
Polished Stones of Interest: Batch 29


In Batch 27’s post I’ve reflected extensively on the outcome of the stones from Batch 29, and Batch 27, 28 and the use of Tin Oxide as the premium polish. If you read that post you’ll discover how disappointed I am in the finish of this combined batch. I have returned most of the stones to the holding box to either redo at 80/100grit or 220grit. Even some of the hydrogrossular garnets pictured above have been sent back to 400grit as upon closer inspection I’m not happy with their finish either.
Three things stand out the most to me after this disappointing polish load:
- Don’t overload the barrel. Always fill to 2/3rds full (and that includes the pellets!)
- Inspect, inspect, inspect. Only smooth stones should make it through to polish (the only exception would be highly unusual stones that have a groove or pit that would be close to impossible to smooth out and you are willing to sacrifice it’s perfect finish)
- Must have enough pellets (or some other medium like small smooth polished stones or ceramic pellets etc) to help cushion the load otherwise the stones will definitely chip and/or scratch each other.
Batch 29 | 3lb Tumbler 4 | Gemstone Beach & 7 precious stones | 2 September – 5 October
4lb Tumbler | Batch 27, 28 & 29 | Gemstone Beach & precious stones | 5 October – 15 October 2023
I very much agree with your three conclusions, and am still having them reinforced with my own tumbling experience. I also have concluded that hydrogrossulars tend not to need much tumbling to get a good shine – if they are smooth to begin with, then a 600 grit tumble plus a polish is likely to be enough. I tumble them with 400, or maybe 220, only to remove rough bits or scratches etc..
I have been vigilant with the inspecting and very focused on not overfilling the barrels including making sure the water line is just below the tops of the stones in the barrel. I’m hoping in my upcoming posts for finished batches that I get a much better (& consistent) polish finish (insert crossed-fingers) 😉
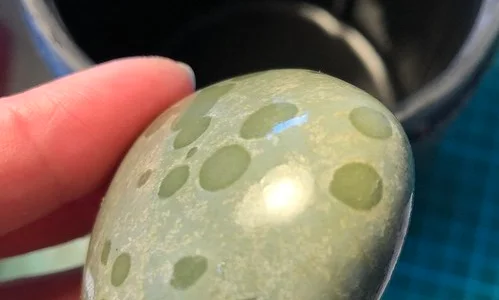
On batch 29 on the pre-tumble I see a greenish rock on the top left corner. Is it a pisolite? I have one similar that was told that’s what it was but I’m concerned at what happens if I tumble it. Will the oval rocks inside it come apart? Do you have any experience with this. I’ve only done one batch, so I’m a real beginner. Thanks for any help!
Hi Susana
Not sure if that’s what it is BUT I am by no means an expert. I looked up pisolite and saw that it means a sedimentary rock, commonly a limestone, consisting of pea-sized concentric formations. It’s definitely not limestone but it does have the pea-sized concentric formations (spherical grains or Pisoids). I can tell you that the concentric formations did not “come apart” and this stone went through all the stages from 80/100grit, 220grit, 400grit then tumble polish without any issues. I took a photo of the finished stone for you (and I’ll update this post with it as well).
If it was me, and I was worried how a stone might go, I think I’d check the stone after 2-3 days to see how it was going, or I might tumble it in 400grit or 600grit first to see how it responds (since 400grit is not as coarse as the grits you usually start a batch with).
Hope that helps!