One of the smaller tweaks I have been making to my whole tumbling stones process has been using less silicon carbide grit in my barrels for Stages 1 through to 3.
With a hardness of 9.5 (Moh’s Scale), the abrasiveness of silicon carbide is perfect for grinding off sharp edges and grinding out shallow pits and gouges so that the tumbled stones can take a polish well. While not overly expensive, silicon carbide isn’t cheap cheap and combined with rising shipping costs it makes sense to make sure that you’re not using more than you really have to!
When I first started out tumbling with one 4lb barrel I would usually add 7 Tbspns of grit per load. As I’ve started following fellow rockstar-tumblers on Instagram/YouTube (like iwantalltherocks & Michigan Rocks), I have reduced the amount of silicon carbide grit I’m adding to a load of stones.
First I reduced the grit to the weight of the stones ratio. For example 1 tablespoon of grit per 1lb of stones. (I’d have to convert that to grams though because we’re on the metric system here in NZ and I don’t usually do lbs for weight!) I was weighing the stones anyway because I like tracking how much stone loss there is per stage.
All the conversion work was a bit of pain though so I’d also seen the tablespoon to the size of the tumbler ration so I thought that might be easier! For example, 3 tablespoons of grit for the 3lb barrel; 4 tablespoons of grit for the 4lb barrel; 6 tablespoons of grit for the 6lb barrels and so on.
I’m not seeing better results by doing this, but I’m not seeing worse results either so that tells me that until recently I have been using more grit than I really needed to so I’m going to stick with the tablespoons of silicon carbide grit per barrel size ratio for now.
Batch 64: 4lb Tumbler 1 / 4lb Tumbler 2
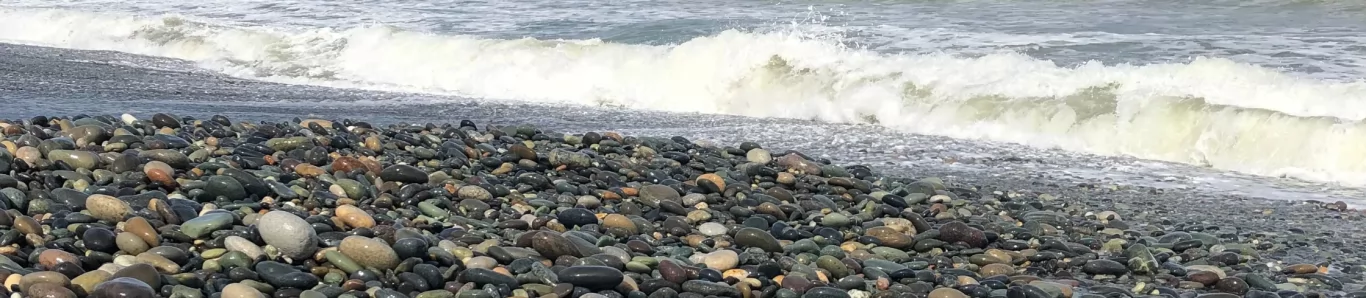
All the stones in Batch 64 are from Gemstone Beach (my local) and I’m trying to video more of what I’m doing in the stone shed to build up good content on my Instagram feed for “TumbleandPolish” – check it out if you’re interested!
Stage 1: F60grit
Number of Stones: 96
Weight in: 1531g
4 Tbspns of F60grit
1½ Tbspns Borax
No pellets added
Days Tumbling: 10
Weight out: 1278g – loss of 253grams
27 stones not ready for Stage 2.
Stage 2: 220grit
Added 8 more stones from the “readies Stage 2” drawer
Number of Stones: 69+8
Weight in: 991g
4 Tbspns of 220grit
Didn’t add borax as I think this causes the lid to leak.
Ceramic media added (new big pellets from Aussie Sapphire)
Days Tumbling: 7
Weight out: 813g – loss of 178g
Stage 3: 400grit – 4lbT2
*Swapped over to 4lbT2 plus added 14 stones from the Stage 3 readies drawer.
Number of Stones: 77+14=91
Weight in: 1051g
4 Tbspns of 400grit
1 Tbspn Borax
Ceramic media added
Days Tumbling: 9
Weight out: g – loss of g
(*swapped barrels because I had a special job for 4lbT1 to do)
Just as a comparison, if I used the weight per tablespoon ratio for silicon carbide grit, I would have used 3 tablespoons of F60grit in Stage 1, 2 tablespoons of 220grit in Stage 2 and 2½ tablespoons of 400grit in Stage 3.
It’s also worth mentioning another tweak I’ve made to the tumbling process. Because it is now harder for the stones to “pass inspection” at the end of Stage 1 and be classed as ready for Stage 2 thanks to the magnifier, I’ve found that Stage 2 doesn’t need to be 10 days. 7 days is actually long enough.
In Stage 2 I was also able to add the new bigger ceramic media pellets that I purchased from Aussie Sapphire. The shipping costs to New Zealand from Australia are HORRENDOUS so I was very lucky that our relatives in Perth planned their annual trip back to NZ in May and were able to bring 2kgs of ceramic media pellets for me in their luggage! I really like these bigger pellets as they are much easier to remove from the stones and they do a great job of cushioning and making up loads in the barrel!
Extra: Stage 4: 600grit
Still 91 stones, 4 tablespoons of 600grit, no borax and still adding ceramic media!
I decided to to do a further 7 days of tumbling in 600grit. I think it’s because a lot of these stones have a mix of minerals in them and JP said to me on his last visit down south that he does the 600grit stage after 400grit to compensate for those patches in a stone that just need further smoothing because they are a little harder than the rest of the stone. Makes sense to me so I thought I’d give it whirl!
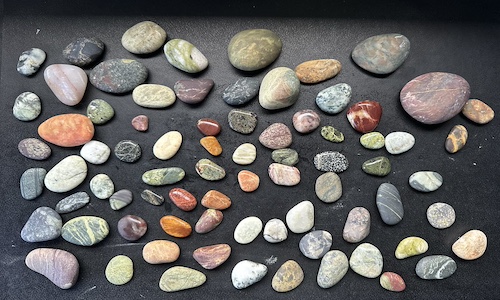
Batch 64: Pre-tumble


Batch 64: After Stage 1


Ready to Polish
I thought that I would experiment with the polish powder / water ratio for this batch. Since the grit ratio is based on the volume of the barrel (eg: 3Tbspns for 3lb barrel) I decided to try 3 tablespoons of polish powder per 100mls of water. I am also trying the polish tumble with ceramic media rather than plastic pellets. That’s probably not a good idea to change two things at once because you can’t tell what made a difference (if any!)
Batch 68 (stones from Slope Point) was also added to the barrel to help make up a full load for polish.
Stage 5: Polish Mix
Number of Stones: 91+33=124
Weight in: 1199g
9 Tbspns of polish powder + 400mls of water.
Ceramic media added for cushioning.
Days Tumbling: 12
Weight out: 1190g – loss of 9grams
Stage 6: Deep Clean
2 Tbspns of borax + ceramic pellets
Days tumbling: 3
Quite a number of these stones did not take a polish (shine) well. I think that two factors contribute to this – one more than the other though.
The composition of the stones means some have a surface or parts of their surface that will never take a shine – that includes stones of a granite composition and some breccia-type stones.
A number of stones have chips and/or bruising so I’m thinking that the ceramic media may not do as good a job of cushioning in the later stages of tumbling as the plastic pellets do. Perhaps the ceramic media is too big to “cushion” and does a better job of making up the load if you don’t have enough stones to fill the barrel to ⅔ full.
There are 3 stones in particular (picture 1B) that are quite interesting in appearance, have taken a shine well but have come out of polish with shallow pits/bruising. I have placed them in the redo drawer for Stage 2 to see if tumbling them again will smooth those bruises/pits out.
Polish Complete – Batch 64 & Batch 68


Polished Stones of Interest: Batch 64


Batch 64 | 4lb Tumbler 2 | Gemstone Beach | 4 June – 29 July 2024
One Reply to “Batch 64: Using Less Silicon Carbide Grit”